
画像やリンクが無効になっている可能性もあるのでご了承下さい。
OpenVPN で VPN 環境を構築する目的
- Android スマートフォンからのインターネットアクセスをどこに居ても自宅 LAN 経由としてセキュリティーを確保する。
- セキュアに LAN 内端末のデータへアクセス可能とする。
仕様
ドコモの Xi と言ったキャリア回線や公衆無線 LAN からのアクセスしてきたクライアントに対し 10.8.0.0/16 の範囲で IP を割り当て、192.168.1.0/24 への接続を許可する。
10.8.0.0/16 から 192.168.1.0/24 へのアクセスはルーティング (tun モード) で実現させる。
サーバーの OS は CentOS 7 だが firewalld ではなく、スクリプトで管理している関係上 iptables を用いた環境とする。
使用ソフト
CentOS 7
OpenVPN 2.5.3
EasyRSA3
下準備
root 作業。ソース展開用のディレクトリを作成し、カレントを移して EasyRSA3 をダウンロード。
mkdir ~/src
cd ~/src
wget https://github.com/OpenVPN/easy-rsa/archive/master.zip -O easyrsa3.zip
OpenVPN のインストール
yum でインストールする場合
Fedora copr からのインストールする場合は以下の通りに。copr の方が新しいバージョンのリリースが速い。
yum install yum-plugin-copr
yum copr enable dsommers/openvpn-release-2.6
Loaded plugins: changelog, copr, fastestmirror

You are about to enable a Copr repository. Please note that this
repository is not part of the main Fedora distribution, and quality
may vary.

The Fedora Project does not exercise any power over the contents of
this repository beyond the rules outlined in the Copr FAQ at
<https://fedorahosted.org/copr/wiki/UserDocs#WhatIcanbuildinCopr>, and
packages are not held to any quality or securty level.

Please do not file bug reports about these packages in Fedora
Bugzilla. In case of problems, contact the owner of this repository.

Do you want to continue? [y/N]: y
copr done
yum install openvpn.x86_64epel のリポジトリからインストールする場合は以下の通り。
yum install epel-release.noarch
yum --enablerepo=epel install openvpn.x86_64
EasyRSA3 のインストール
ダウンロードしたアーカイブを展開してコピーする。
cd ~/src
unzip easyrsa3.zip
cp -r ./easy-rsa-master/easyrsa3/ /etc/openvpn/
不要になったソースとアーカイブは任意で削除する。
EasyRSA3 を用いた証明書の作成
認証局作成 (CA)
カレントを移して CA を作る
cd /etc/openvpn/easyrsa3
./easyrsa init-pki
次のコマンドでは PEM pass phrase と Common Name を任意に設定する事。
./easyrsa build-ca
サーバー証明書の作成
パスワード無しのサーバー用証明書を作成。
./easyrsa build-server-full server nopass
DH パラメータの作成と設置
マシンスペックによって時間が掛かる。
./easyrsa gen-dh
クライアント証明書廃止リスト作成
一度ダミーの証明書を作成して revoke したあとに crl.pem を作成する。
./easyrsa build-client-full dmy nopass
./easyrsa revoke dmy
./easyrsa gen-crl
証明書の設置
証明書を設置するディレクトリを作成、証明書をコピーして所有権やアクセス権を変更する。
mkdir -p /etc/openvpn/server/certs
cp ./pki/ca.crt /etc/openvpn/server/certs
cp ./pki/issued/server.crt /etc/openvpn/server/certs
cp ./pki/private/server.key /etc/openvpn/server/certs
cp ./pki/dh.pem /etc/openvpn/server/certs
cp ./pki/crl.pem /etc/openvpn/server/certs
chown nobody:nobody /etc/openvpn/server/certs/*.{crt,key,pem}
chmod 600 /etc/openvpn/server/certs/*.{crt,key,pem}
chmod 604 /etc/openvpn/server/certs/crl.pem
設定を終えたらカレントをホームにでも移しておく
cd
OpenVPN の設定
TLS 認証キー作成と設定ファイルの設置
TLS 認証キー作成
openvpn --genkey --secret /etc/openvpn/server/certs/ta.key
OpenVPN サーバー設定ファイルのコピー
cp /usr/share/doc/openvpn-*/sample/sample-config-files/server.conf /etc/openvpn/server/server.conf
設定ファイルの編集
server.conf が OpenVPN サーバーとしての設定ファイルになるので編集する。
vi /etc/openvpn/server/server.conf
内容は次に編集した箇所のみコメントを入れて抜粋する。プライベートアドレスは適時合わせて編集する。
# OpenVPN Server が Listen するプライベート IP アドレスを設定する
local 192.168.1.x

# 証明書のパスを設定
ca certs/ca.crt
cert certs/server.crt
key certs/server.key
dh certs/dh.pem

# Defaults の net30 は not recommended なので subnet に
topology subnet

# クライアントに割り当てる IP アドレスのネットワークアドレスを設定する
server 10.8.0.0 255.255.255.0

# OpenVPN が動作しているホストをクライアントのゲートウェイにする
push "redirect-gateway def1"

# クライアントが使う DNS サーバーを指定する
push "dhcp-option DNS 192.168.1.y"

# クライアント同士がアクセス出来る様にする。
client-to-client

# TLS 認証キーのパスを設定
tls-auth certs/ta.key 0

# 暗号化方式を AES-256-GCM に変更する
cipher AES-256-GCM

# OpenVPN Server のプロセスを nobody で実行し、セキュリティを高める
user nobody
group nobody

# OpenVPN のログファイルを指定する
log-append  /var/log/openvpn.log

# OpenVPN が再起動した事を通知して自動的に再接続するようにする。
# OpenVPN 2.3 ではコメントアウトして無効化しないと起動不可。
explicit-exit-notify 1

# 以下追記していく
# クライアント証明書の廃止リストを指定する
crl-verify crl.pem

# TLS と認証
tls-version-min 1.2
tls-cipher TLS-DHE-RSA-WITH-AES-256-GCM-SHA384
auth SHA512

# tunnel デバイスの MTU とカプセル化後のパケットサイズを調整する
tun-mtu 1500
mssfix 1426詳細は OpenVPN の Security Advisories にある The VORACLE attack vulnerability の項に書いてある。
以下サンプルの設定ファイルと編集後の設定ファイルの差分。(ちょっとあれこれ弄った残骸入り)
# diff -u /usr/share/doc/openvpn-*/sample/sample-config-files/server.conf /etc/openvpn/server/server.conf
--- /usr/share/doc/openvpn-2.5.3/sample/sample-config-files/server.conf 2021-07-18 01:02:53.523860789 +0900
+++ /etc/openvpn/server/server.conf     2021-07-18 00:39:19.806262197 +0900
@@ -23,6 +23,7 @@
 # Which local IP address should OpenVPN
 # listen on? (optional)
 ;local a.b.c.d
+local 192.168.1.x

 # Which TCP/UDP port should OpenVPN listen on?
 # If you want to run multiple OpenVPN instances
@@ -75,21 +76,21 @@
 # Any X509 key management system can be used.
 # OpenVPN can also use a PKCS #12 formatted key file
 # (see "pkcs12" directive in man page).
-ca ca.crt
-cert server.crt
-key server.key  # This file should be kept secret
+ca certs/ca.crt
+cert certs/server.crt
+key certs/server.key  # This file should be kept secret

 # Diffie hellman parameters.
 # Generate your own with:
 #   openssl dhparam -out dh2048.pem 2048
-dh dh2048.pem
+dh certs/dh.pem

 # Network topology
 # Should be subnet (addressing via IP)
 # unless Windows clients v2.0.9 and lower have to
 # be supported (then net30, i.e. a /30 per client)
 # Defaults to net30 (not recommended)
-;topology subnet
+topology subnet

 # Configure server mode and supply a VPN subnet
 # for OpenVPN to draw client addresses from.
@@ -99,7 +100,7 @@
 # on 10.8.0.1. Comment this line out if you are
 # ethernet bridging. See the man page for more info.
 server 10.8.0.0 255.255.255.0
-
+;server 192.168.1.128 255.255.255.128
 # Maintain a record of client <-> virtual IP address
 # associations in this file.  If OpenVPN goes down or
 # is restarted, reconnecting clients can be assigned
@@ -138,7 +139,7 @@
 # to know to route the OpenVPN client
 # address pool (10.8.0.0/255.255.255.0)
 # back to the OpenVPN server.
-;push "route 192.168.10.0 255.255.255.0"
+;push "route 192.168.1.0 255.255.255.0"
 ;push "route 192.168.20.0 255.255.255.0"

 # To assign specific IP addresses to specific
@@ -190,6 +191,7 @@
 # or bridge the TUN/TAP interface to the internet
 # in order for this to work properly).
 ;push "redirect-gateway def1 bypass-dhcp"
+push "redirect-gateway def1"

 # Certain Windows-specific network settings
 # can be pushed to clients, such as DNS
@@ -197,7 +199,8 @@
 # http://openvpn.net/faq.html#dhcpcaveats
 # The addresses below refer to the public
 # DNS servers provided by opendns.com.
-;push "dhcp-option DNS 208.67.222.222"
+push "dhcp-option DNS 192.168.1.y"
 ;push "dhcp-option DNS 208.67.220.220"

 # Uncomment this directive to allow different
@@ -206,7 +209,7 @@
 # To force clients to only see the server, you
 # will also need to appropriately firewall the
 # server's TUN/TAP interface.
-;client-to-client
+client-to-client

 # Uncomment this directive if multiple clients
 # might connect with the same certificate/key
@@ -235,27 +238,32 @@
 # to help block DoS attacks and UDP port flooding.
 #
 # Generate with:
-#   openvpn --genkey tls-auth ta.key
+#   openvpn --genkey --secret ta.key
 #
 # The server and each client must have
 # a copy of this key.
 # The second parameter should be '0'
 # on the server and '1' on the clients.
-tls-auth ta.key 0 # This file is secret
+tls-auth certs/ta.key 0 # This file is secret

 # Select a cryptographic cipher.
 # This config item must be copied to
 # the client config file as well.
-# Note that v2.4 client/server will automatically
+# Note that 2.4 client/server will automatically
 # negotiate AES-256-GCM in TLS mode.
 # See also the ncp-cipher option in the manpage
-cipher AES-256-CBC
+cipher AES-256-GCM

 # Enable compression on the VPN link and push the
-# option to the client (v2.4+ only, for earlier
+# option to the client (2.4+ only, for earlier
 # versions see below)
 ;compress lz4-v2
 ;push "compress lz4-v2"
+;compress lz4
+;push "compress lz4"

 # For compression compatible with older clients use comp-lzo
 # If you enable it here, you must also
@@ -271,8 +279,8 @@
 #
 # You can uncomment this out on
 # non-Windows systems.
-;user nobody
-;group nobody
+user nobody
+group nobody

 # The persist options will try to avoid
 # accessing certain resources on restart
@@ -284,7 +292,8 @@
 # Output a short status file showing
 # current connections, truncated
 # and rewritten every minute.
-status openvpn-status.log
+status /var/log/openvpn-status.log
+status-version 1

 # By default, log messages will go to the syslog (or
 # on Windows, if running as a service, they will go to
@@ -294,7 +303,7 @@
 # while "log-append" will append to it.  Use one
 # or the other (but not both).
 ;log         openvpn.log
-;log-append  openvpn.log
+log-append  /var/log/openvpn.log

 # Set the appropriate level of log
 # file verbosity.
@@ -313,3 +322,17 @@
 # Notify the client that when the server restarts so it
 # can automatically reconnect.
 explicit-exit-notify 1
+
+# Additional Settings
+;management localhost 7505
+tls-version-min 1.2
+tls-cipher TLS-DHE-RSA-WITH-AES-256-GCM-SHA384
+auth SHA512
+
+crl-verify certs/crl.pem
+
+tun-mtu 1500
+mssfix 1426
Firewall 関連の設定
net.ipv4.ip_forward の値を 1 に変更して IP フォワードを有効化して反映させる。
vi /etc/sysctl.conf
net.ipv4.ip_forward=1
sysctl -p
場合に応じて次の通りになるような設定を行う。NIC のデバイス名は適時変更すること。
コマンドラインから追加する場合。
iptables -I INPUT -p udp --dport 1194 -j ACCEPT
iptables -I FORWARD -i tun+ -j ACCEPT
iptables -I FORWARD -o tun+ -j ACCEPT
iptables -I INPUT -i tun+ -j ACCEPT
iptables -I OUTPUT -o tun+ -j ACCEPT
iptables -t nat -I POSTROUTING -s 10.8.0.0/16 -o ens33 -j MASQUERADE
以下 /etc/sysconfig/iptables に書いておく場合。
vi /etc/sysconfig/iptables
*filter
-A INPUT -p udp --dport 1194 -j ACCEPT
-A INPUT -i tun+ -j ACCEPT
-A OUTPUT -o tun+ -j ACCEPT
-A FORWARD -o tun+ -j ACCEPT
-A FORWARD -i tun+ -j ACCEPT
COMMIT
*nat
:PREROUTING ACCEPT [0:0]
:POSTROUTING ACCEPT [0:0]
:OUTPUT ACCEPT [0:0]
-A POSTROUTING -s 10.8.0.0/16 -o ens33 -j MASQUERADE
COMMIT
ブロードバンドルーター側の設定
我が家は ASUS RT-AX3000 を使用しているので、ポートフォワーディング設定より 1194/UDP を OpenVPN が動作しているホストにマッピングすれば OK だった。

OpenVPN の起動
次の通り systemd を用いて自動起動するように設定し、起動する。
systemctl enable openvpn-server@server.service
systemctl start openvpn-server@server.service
クライアントで接続する為に必要な証明書の作成
クライアント証明書の作成
サーバー側で root ユーザーにて作業を行う。
証明書はクライアント毎に作るので分かりやすい様にしておくと良い。今回は Android 端末で使用するので android と名付けた。パスワード入力も面倒臭そうなので nopass を付加してパスワード無しとした。
cd /etc/openvpn/easyrsa3/
./easyrsa build-client-full android nopass
接続に必要なプロファイルの作成
Android のアプリとして本記事では OpenVPN for Android を用いて説明を行う。

以下は OpenVPN オフィシャルなアプリ。ユーザーサイドはどちらのクライアントを使用しても問題は無い。
auth-nocache など、一部設定が適用されない場合もある。また、切断時の処理がキチンとしているので日常的に使用するのであればこちらのアプリの方が良いかも。

接続する為には予め拡張子「.ovpn」となるプロファイルを作っておく必要がある
プロファイル作成にあたっては予め作成しておいた次の証明書関連ファイルが必要。
/etc/openvpn/server/certs/ca.crt
/etc/openvpn/server/certs/ta.key
/etc/openvpn/easyrsa3/pki/issued/android.crt
/etc/openvpn/easyrsa3/pki/private/android.key
以下プロファイルのひな形のような物を仮に sample.ovpn としておく。
このひな形に対してやるべき事は次の 8 こ。
- VPN_SERVER_ADDRESS を自分の持つグローバル IP アドレス、若しくは正しく IP アドレスを引けるドメイン名に書き換えておく。
- <ca></ca> の間には ca.crt の内容をまるごとコピペ。
- <key></key> の間には android.key (クライアント秘密鍵) の内容をまるごとコピペ。
- <cert></cert> の間には android.crt (クライアント証明書) の内容をまるごとコピペ。
- <tls-auth></tls-auth> の間には ta.key (TLS 認証キー) の内容をまるごとコピペ。
- 完成した sample.ovpn ファイルをなるべくセキュアな経路を用いて Android 端末にコピーする。
- OpenVPN for Android からプロファイルをインポートさせる。
- プロファイルをインポートさせた時点で
auth-nocacheオプションがなぜか消えてしまう為、カスタム設定にauth-nocacheを追記してから接続を行う
client
dev tun
remote VPN_SERVER_ADDRESS 1194 udp
proto udp4
key-direction 1
route 0.0.0.0 0.0.0.0 vpn_gateway
remote-cert-tls server
auth SHA512
auth-nocache
cipher AES-256-GCM
tun-mtu 1500
mssfix 1426
<ca>
ここに ca.crt の内容をコピペ
</ca>
<key>
ここに android.key (クライアントの秘密鍵) の内容をコピペ
</key>
<cert>
ここに android.crt (クライアント証明書) の内容をコピペ。BEGIN CERTIFICATE ~ END CERTIFICATE の行だけでも OK
</cert>
<tls-auth>
ここに ta.key の内容をコピペ
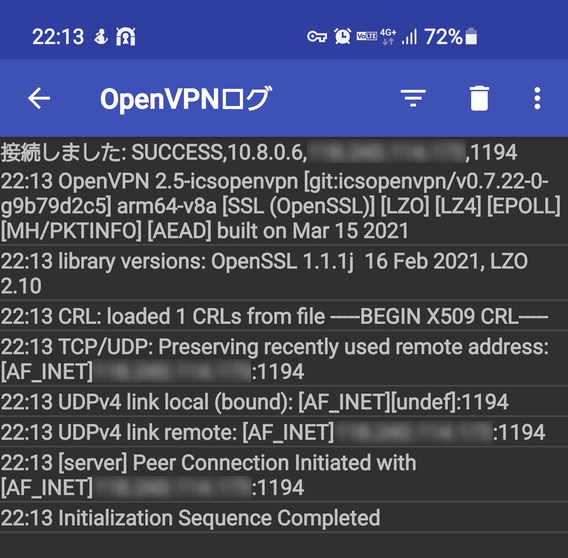
</tls-auth>適切に設定が行われていればエラーも無く正常に接続される。
OpenVPN Connect アプリで接続すると、サーバー側に以下のような Warning が出る。
WARNING: 'link-mtu' is used inconsistently, local='link-mtu 1549', remote='link-mtu 1521'
サーバー及びクライアントの設定では link-mtu 及び tun-mtu は何れか一方のみの記述しか出来ない。
その為、基本的には tun-mtu でトンネルデバイスの MTU のみを設定する。すると link-mtu が tun-mtu の値を参照して自動的に設定される。
自動設定された値がサーバーとクライアントで同一ではない場合に表示されるのが上記 Warning となる。なので無視する他ない。
その他場合に応じて必要な作業
DNS サーバーが LAN 内に存在する場合
LAN 内に DNS サーバーを立てている時、10.8.0.0/16 からのクエリーや再帰クエリーを許可しなくては名前が引けない。
192.168.1.0/24 内で動作している場合、localnets から外れてしまうのでクエリーは破棄されてしまう。
以下参考。
allow-query     { localhost; localnets; 10.8.0.0/16; };

view internal {
        match-clients { localnets; 10.8.0.0/16; };
        allow-recursion { 127.0.0.1; 192.168.1.0/24; 10.8.0.0/16; };
Samba の設定変更
許可したホストのみアクセス出来る様な設定にしている為、新たに 10.8.0.0/16 のセグメントを許可して上げる。
参考。
hosts allow = 127.0.0.1, 192.168.1.0/24, 10.8.0.0/16これでもアクセス出来ない場合、iptables など Firewall の設定を見なおす。(137/UDP, 138/UDP, 139/TCP, 445/TCP のマッピング等)
Web サーバーなど
192.168.1.0/24 等と指定してアクセス制限を掛けているパスに対して 10.8.0.0/16 も追加してあげると VPN を活かせる。
参考 (Nginx)
location /wp-admin {
    allow 192.168.1.0/24;
    allow 10.8.0.0/16;
    deny all;
}
おわりに
VPN には以前より興味こそあったものの「うわー面倒臭いわー」で敬遠してきたが、公衆無線 LAN に繋いでデータを垂れ流すことに抵抗を憶えてきたので重い腰を上げて実装に乗り出した。
いざやってみると中々楽しい部分が多かったが、ルーティング周りでトラブったりと正常動作するまでに相当の時間を要してしまった。
実はこの OpenVPN を試す前に L2TP/IPsec も試したりしたが、一部 Android アプリで正常な通信が出来なかったりで常用は取りやめた経緯がある。機能的にはどっちもどっちだけど、今回の OpenVPN の方が多少楽に使えるようになったから採用するに至った。
今回の VPN 実装で自宅内の無線 LAN 以外のキャリア回線や公衆無線 LAN から自宅内の LAN へ TLS を用いた暗号化経路でセキュアな通信を確保しつつも Samba や Windows の共有フォルダへのアクセスまで出来るようになったのでやって良かったと久々に思える作業だった。
参考にさせて頂いたサイト


Revision
- 2017/03/1814:15OpenVPN の設定 server.conf にて push “route 192.168.1.0 255.255.255.0” の記述を削除。デフォルトのままのコメントアウトに修正。
これは OpenVPN サーバーとは別セグメントへの経路を確保する場合にのみ用いる物だとの事で。参考 URL
接続用プロファイルとした sample.ovpn の内容で重複した項目があったのとパラメータ変更をした。 - 2017/04/0122:20コマンドラインの表記を prism.js でハイライトするように全般的な修正を行った。
- 2017/05/1803:10記事中の誤字修正
- 2017/09/1521:38クライアントプロファイル内には crl.pem を記述しない方が良いので、該当部分を削除した。
- 2017/12/3113:11「自ビルドパッケージをインストールした場合。」内の Unit ファイルを記述したうち、引数
--writepid /var/run/openvpn/%i.pidを--writepid /var/run/%i.pidに修正した。
これは /var/run/openvpn とディレクトリを掘っても気がつくと消されている為で、OpenVPN の起動に失敗する原因になっていた為。 - 2021/07/1715:50サーバー、クライアントの設定内容を見直し、発生していた Warning を全て抑制させた。
- 2021/07/1722:50OpenVPN のインストール方法に yum で Fedora copr を使用したものを追記。
以前からソースファイルに spec ファイルが付属しなくなったので、自ビルドに関する箇所を削除。
クライアントプロファイル設定へproto udp4を追記。IPv4 の使用を明示的に行う事にした。
誤字修正。 - 2021/07/181:10OpenVPN 2.5 で systemd の Unit ファイルが変更されていたので、それに合わせて証明書のパスや設定ファイルの位置を修正した。
- 2021/07/182:10Server/Client 共に fragment の使用をやめた。この事で OpenVPN オフィシャルなクライアントでも普通にインポートして接続が出来るようになった。
どうも OpenVPN で fragment の処理を行うよりも、より低いレイヤーの処理に任せた方が良いという事らしい。 - 2021/07/250:41OpenVPN Connect を用いた接続にて出る Warning に関する説明を追記。
OpenVPN for Android と OpenVPN Connect の両アプリで問題無く接続出来る様にクライアント設定の調整を行った。 - 2024/08/1521:00Copr の リポジトリ名を OpenVPN 2.6 系のものへ変更した。

コメント